Create a new app integration
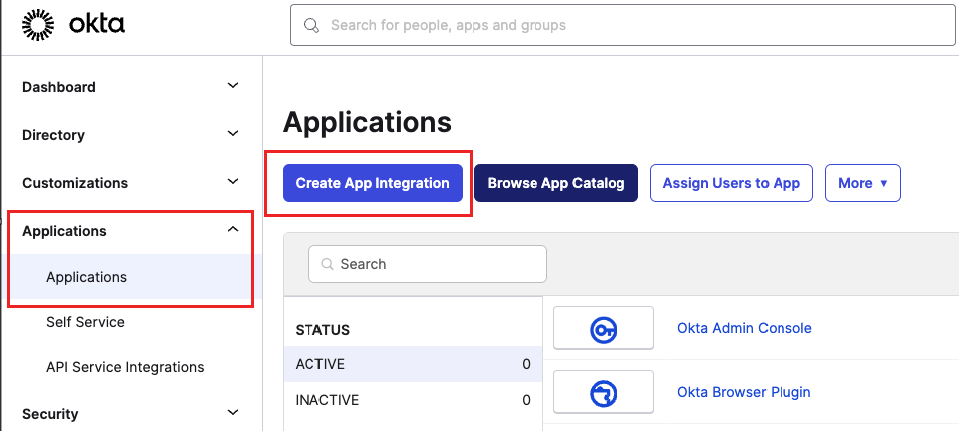
- Click Applications on the left side of the navigation section.
- Click Applications
- Click Create App Integration
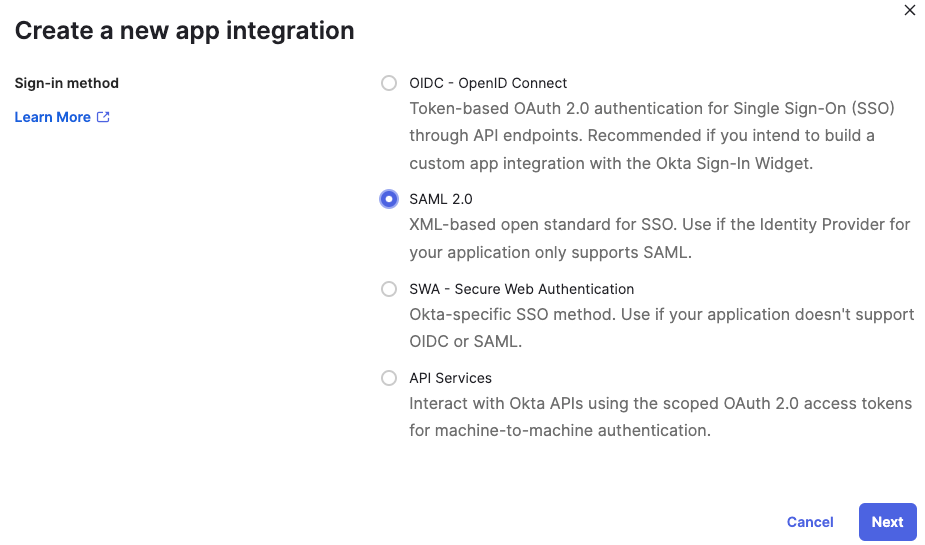
- On the Create a new app integration page
- Select Sign-in method SAML 2.0
- Click Next button
- Enter the App name as OpenMethods-SAML2 ( a suggestion )
- Click Next button
 |
 |
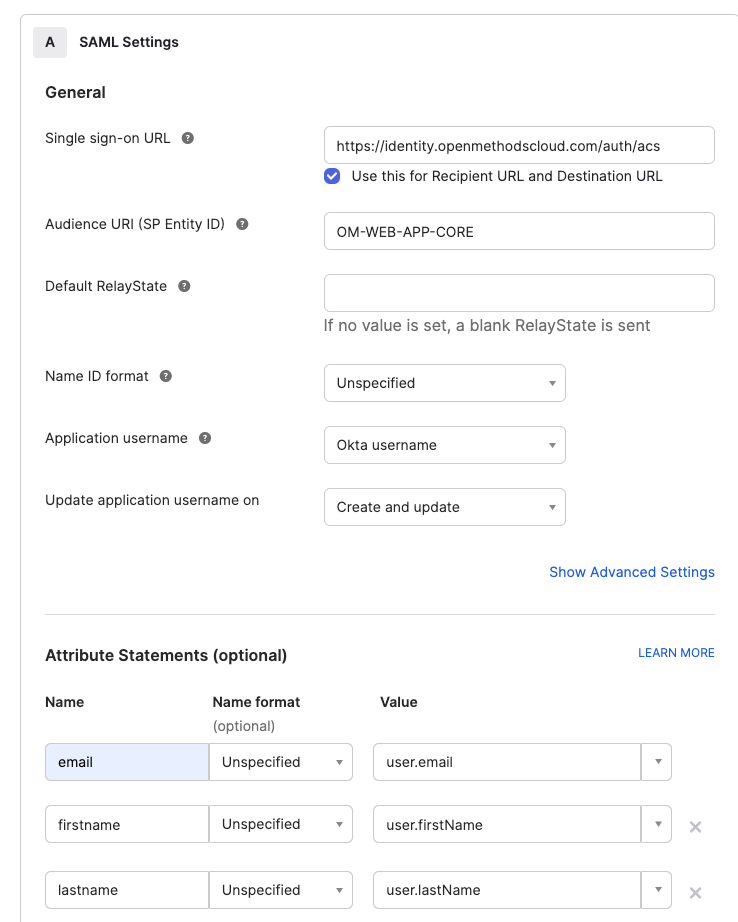
- SAML Settings page will open.
- Single sign-on URL
- Audience URI (SP Entity ID)
- Enter OM_WEB_APP_CORE
- This value will be used as Issuer in the Provider Configuration in the Experience Designer.
- Leave other fields as it is.
-
Attribute Statements
- Add the following attribute Name and Value mapping.
- Email - user.email
- first name - user.firstName
- lastname - user.lastName
- Click Next button
- Add the following attribute Name and Value mapping.
- Select Customer or Partner
- Click Save button
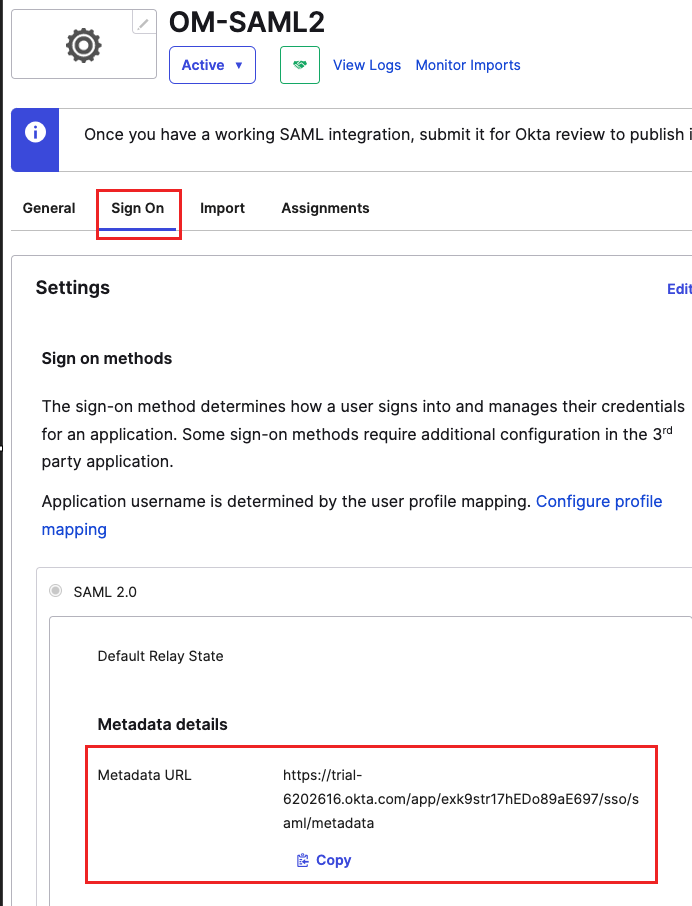
Copy the Metadata URL
- Select the Application name OpenMethods-SAML2
- Click Sign On
- The metadata URL is available under Metadata details under the section SAML 2.0
- Click the Copy link to copy it into the clipboard.
Assignments
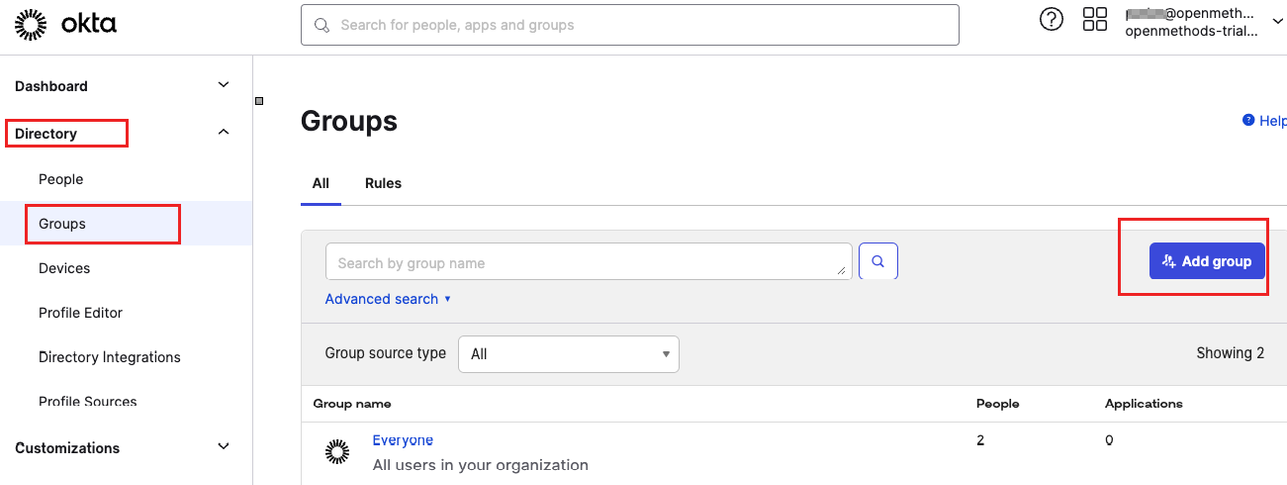
- Create a new Group
- Click Directory, then Groups
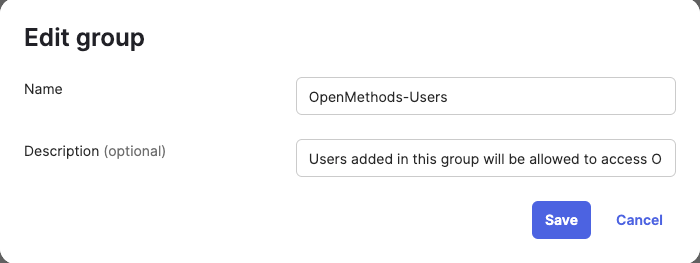
- Click the Add Group button
- Enter Name - OpenMethods-User ( a suggestion )
 |
 |
-
Assign people to the groups.
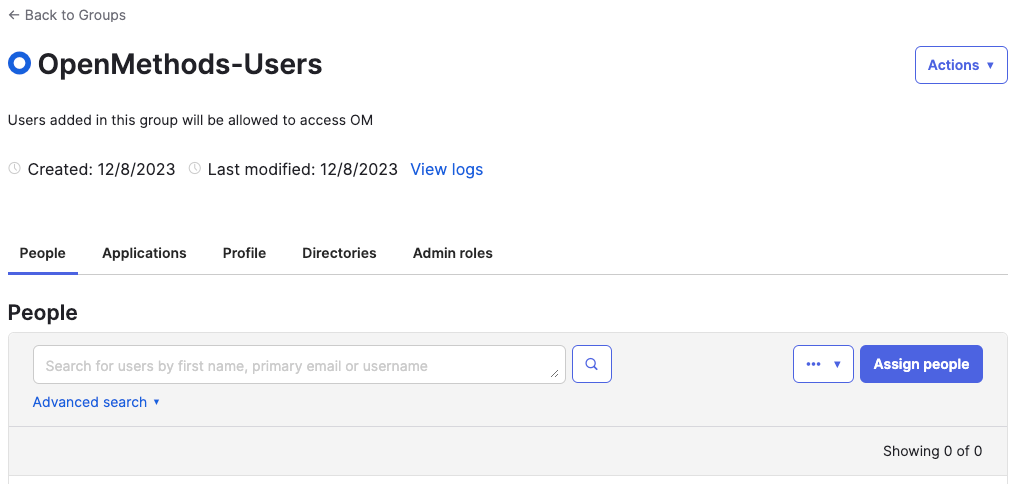
- Click the group name from the group list
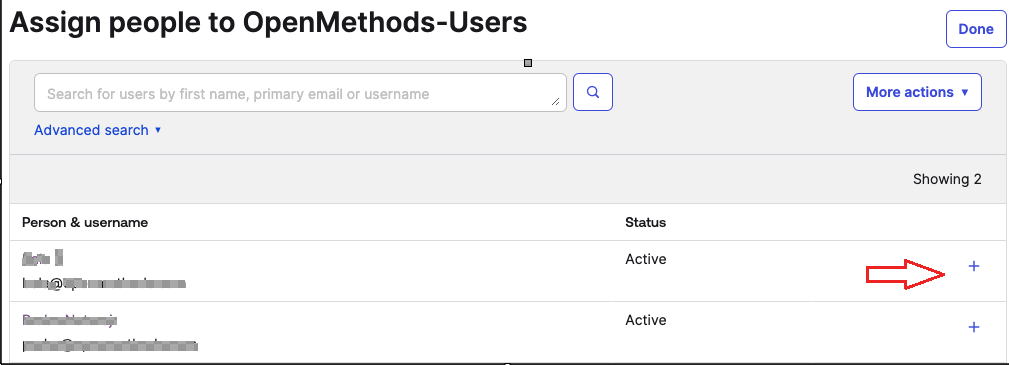
- Click the Assign People button
- Select the people from the list, by clicking the + sign, and they should be added to the selected Group.
 |
 |
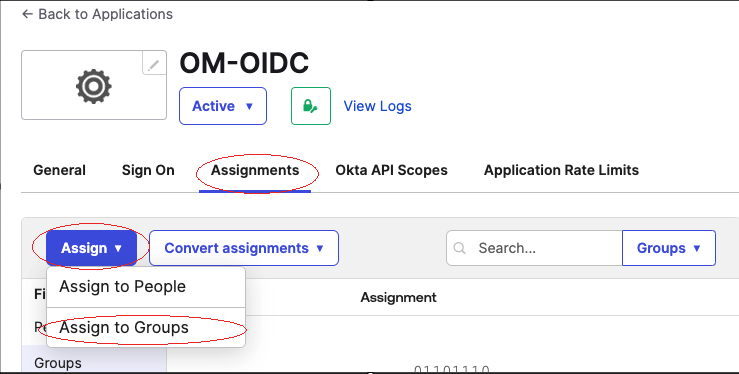
- Assign the Group
- Goto Applications and Select the Application name
- Click Assignments
- Select Group from the Assign dropdown
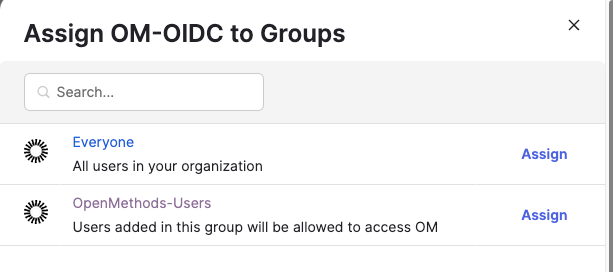
- Click Assign to Groups
- Click Assign next to the OpenMethods-Users Group
- Click the Done button.
 |
 |