Sometimes we find it much easier to write some code to do simple or even more complex tasks within a PopFlow. Either way, we have the flexibility to support code blocks in PopFlow.
Incorporating code within PopFlows is accomplished using two activities.
- Run Javascript : Which by definition,examples allows you to execute Javascript
- Dynamic UI : Generating HTML code directly into screenpop within the CRM.
Let's review the basics!

Run Javascript Activity
- Search Activities for "javascript" or filter by selecting "Data"
- The results will pull up the Run Javascript Activity

The activity allows you to insert your own Javascript in your PopFlow.
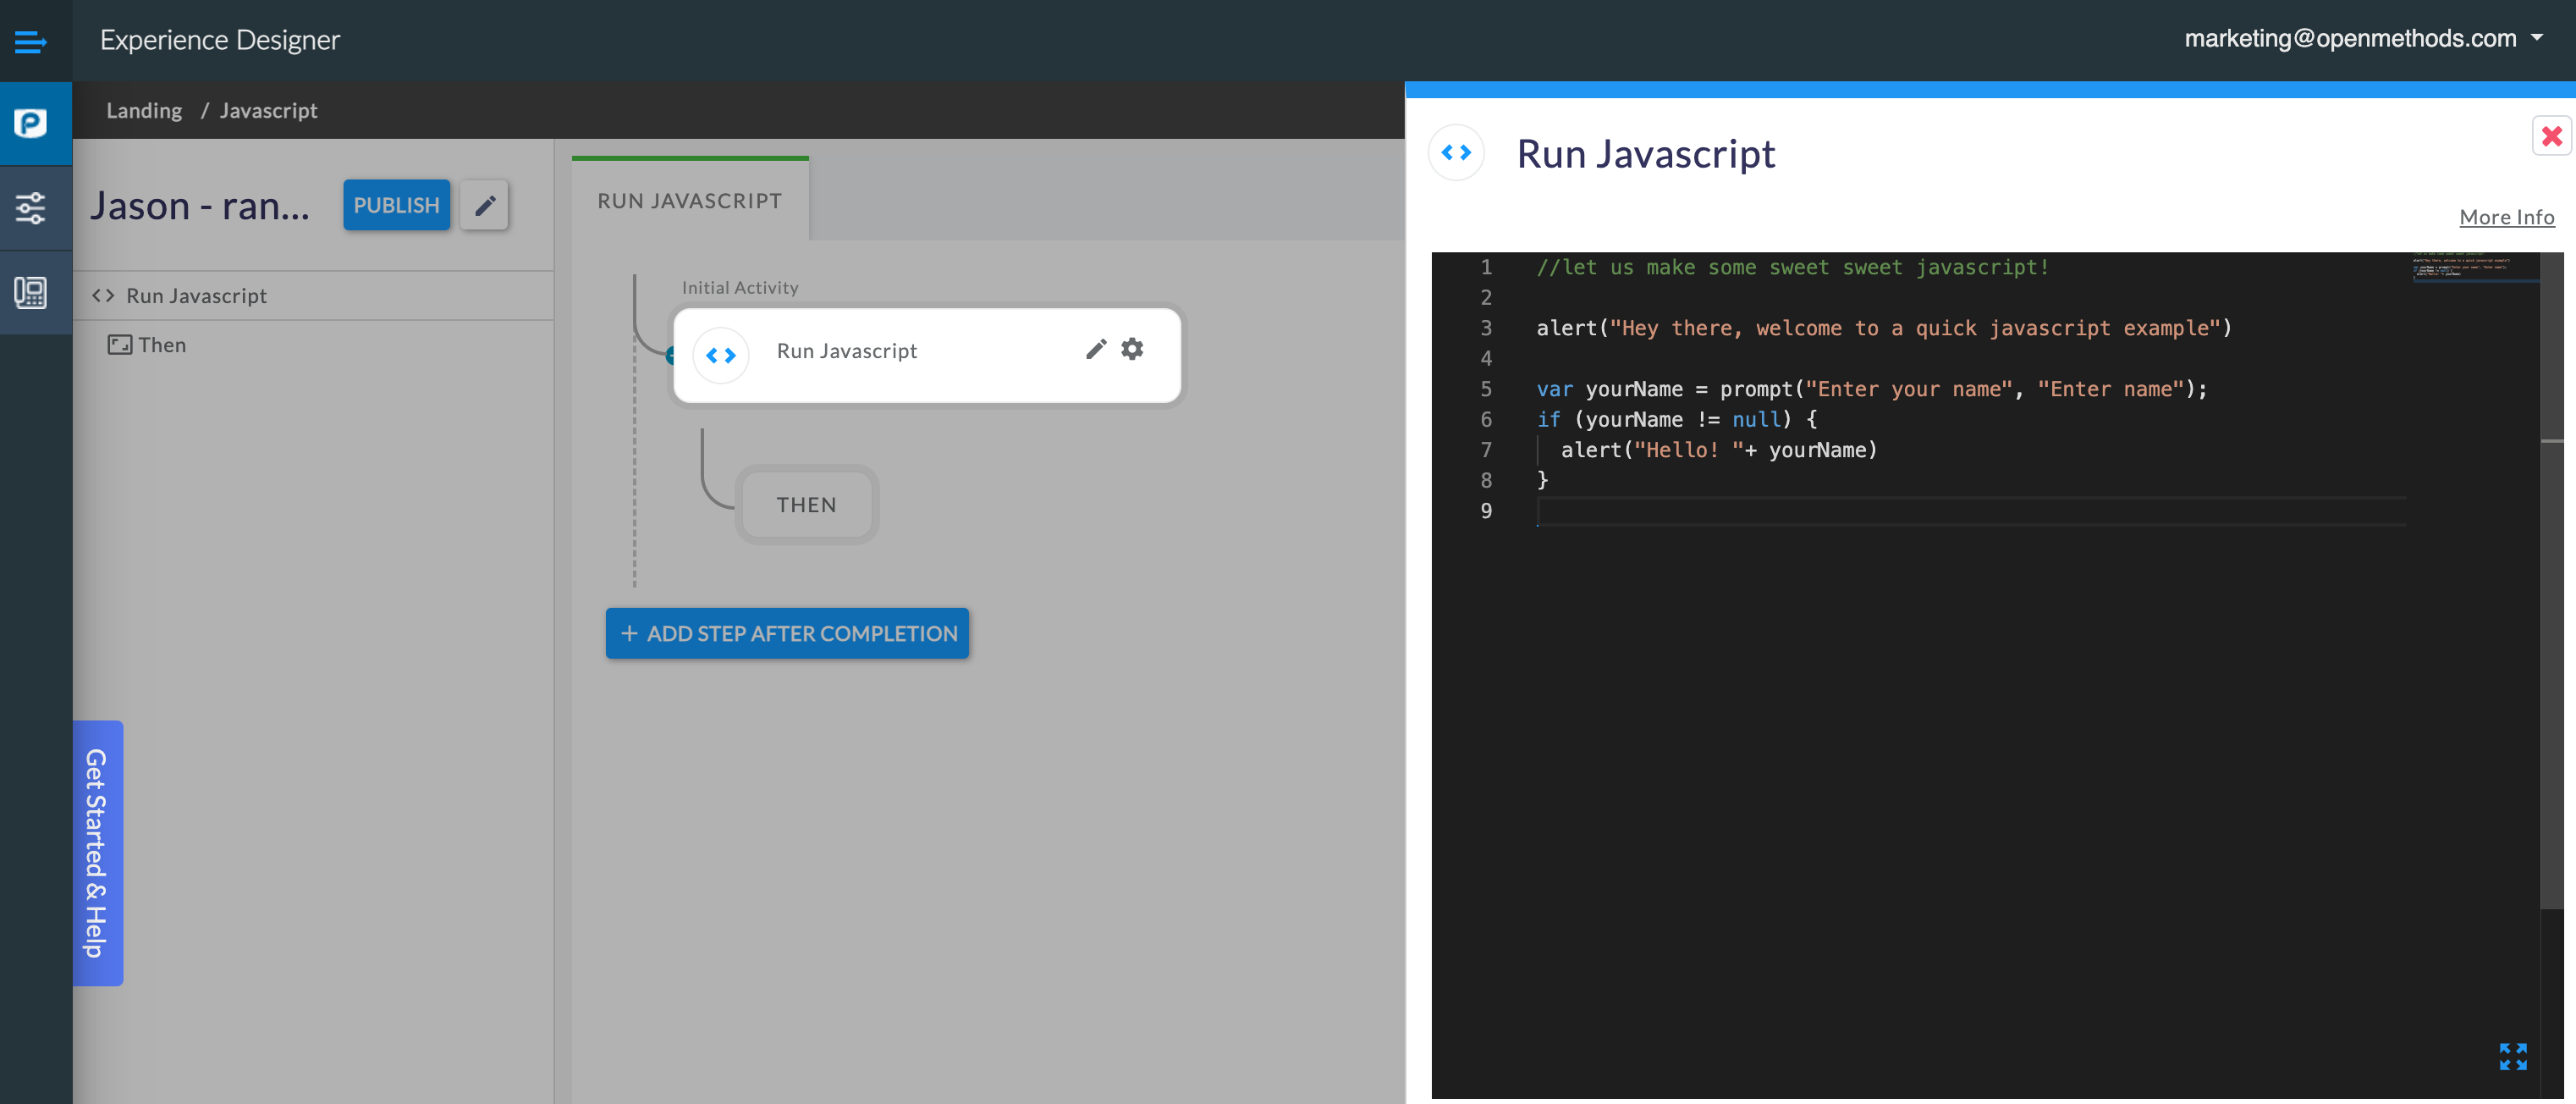
A Basic Javascript Example
//lets make some sweet sweet javascript!ja
alert("Hey there, welcome to a quick javascript example")
var yourName = prompt("Enter your name", "Enter name");
if (yourName != null) {  alert("Hello! "+ yourName)}
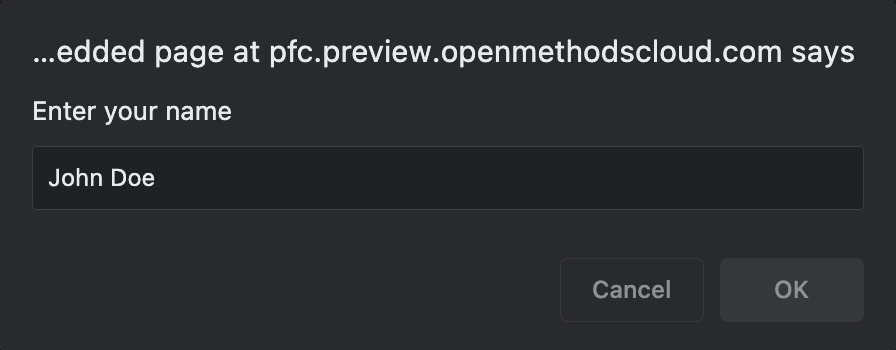
Running the basic test above, you will be prompted with three message alerts:


Sharing Data Between Activities & Workflows
Using the same example above, we can save yourName into a variable used further downstream in a PopFlow.
Let's first show what happens when you attempt to access yourName outside the “Initial Activity” or code block it was originally used within.
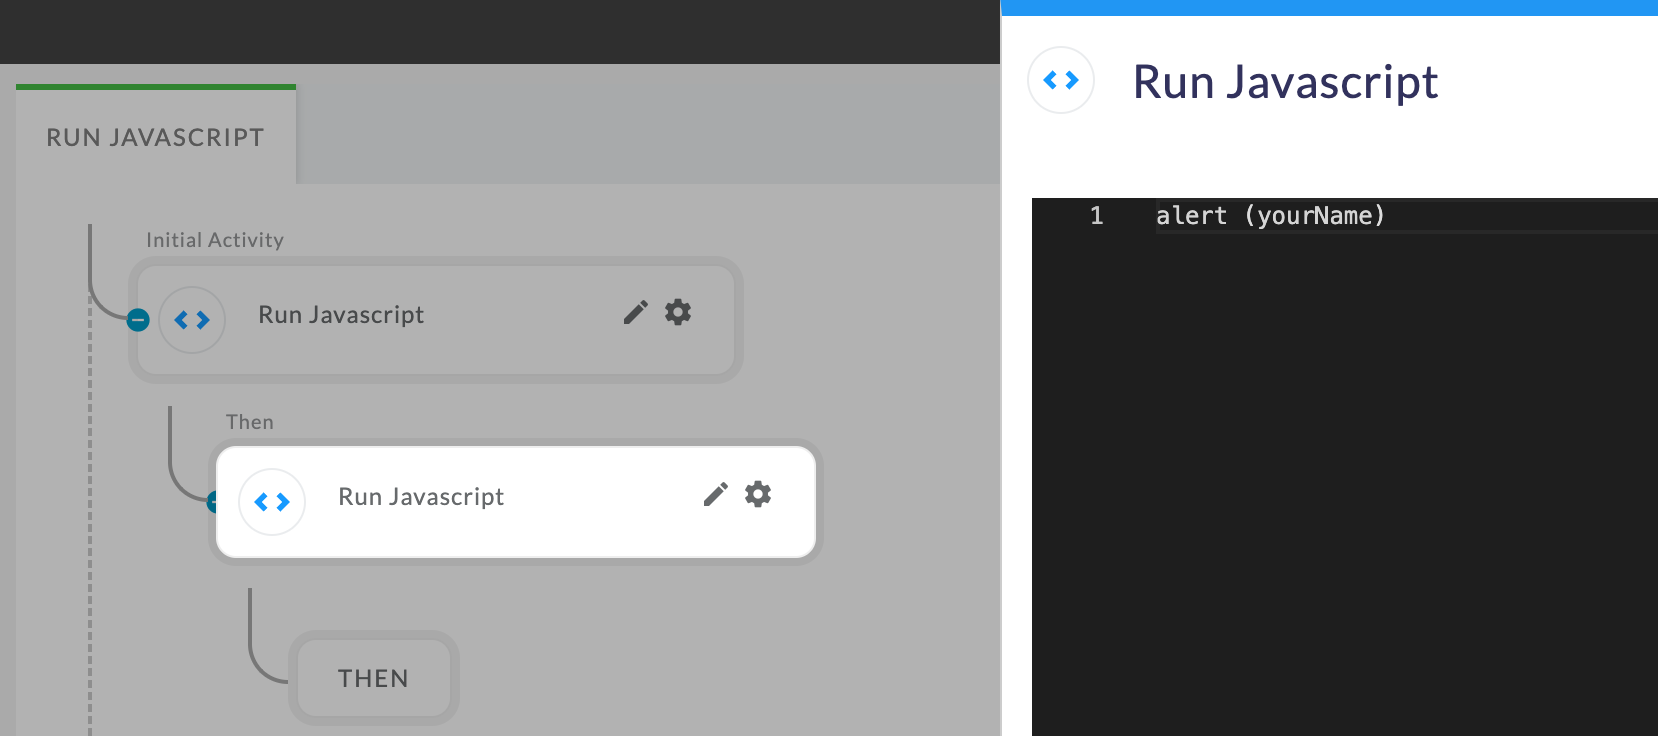
- Create a new “Run Javascript” activity below “Initial Activity” and use the following code:
alert (yourName)Now run the test and view the Inspector's results. You should have now seen Four Alert Messages. However, you only saw three because we failed the last Run Javascript step.
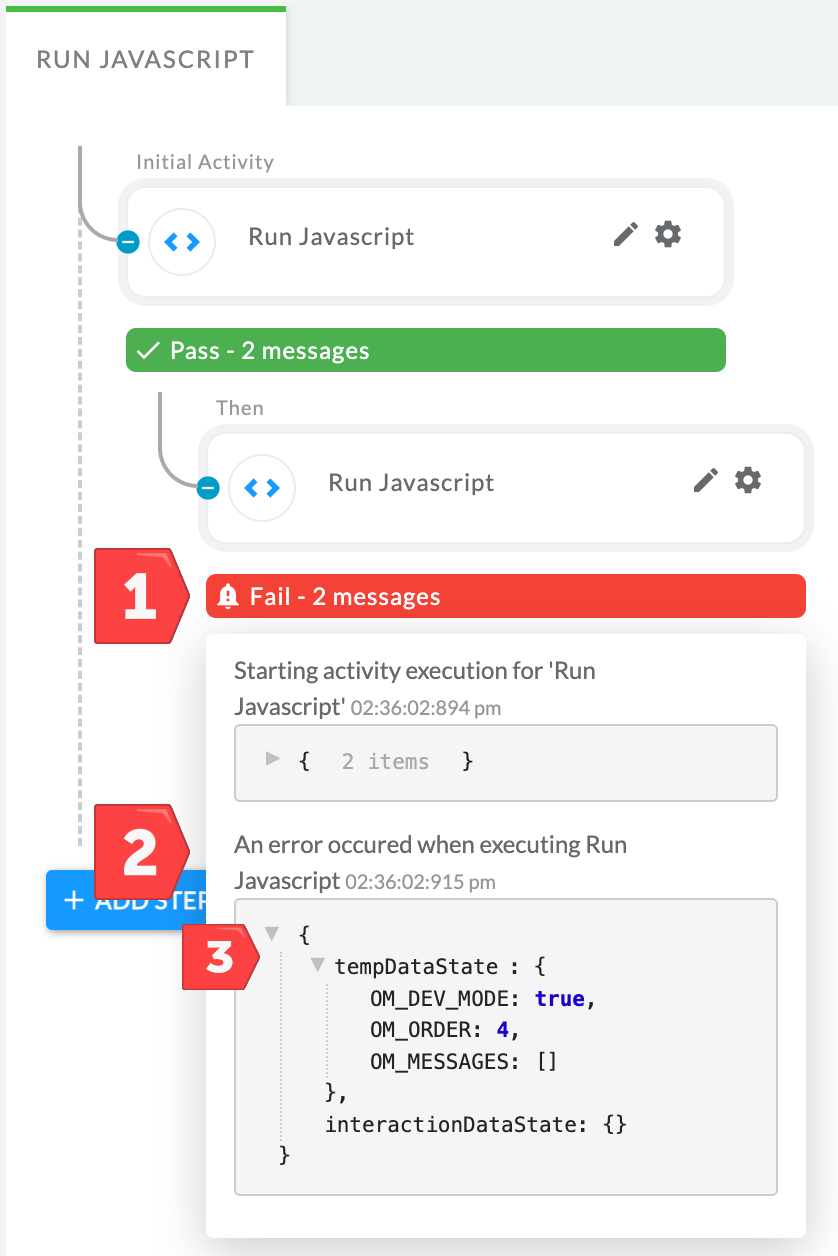
- Click “Fail”
- Expand the JSON
- View the data returned.
Each “Run Javascript” activity is self-contained.
While the approach theoretically works, activities that come after it, even several steps away, won't be aware of the results because the "Run Javascript" activity executes its own Javascript.
We need to pass data into a “tempDataState” variable, to resolve this.
- Edit the “Initial Activity” step to include:
//lets make some sweet sweet javascript!
alert("Hey there, welcome to a quick javascript example")
var yourName = prompt("Enter your name", "Enter name");
if (yourName != null) {  alert("Hello! "+ yourName)}
//save the variable results into state.tempData.yourName for future use
state.tempData.yourName = yourName
2. Then edit the next Run Javascript to include:
//alert the browser again, from information saved in prev. step
alert (state.tempData.yourName)
3. Re-Test!
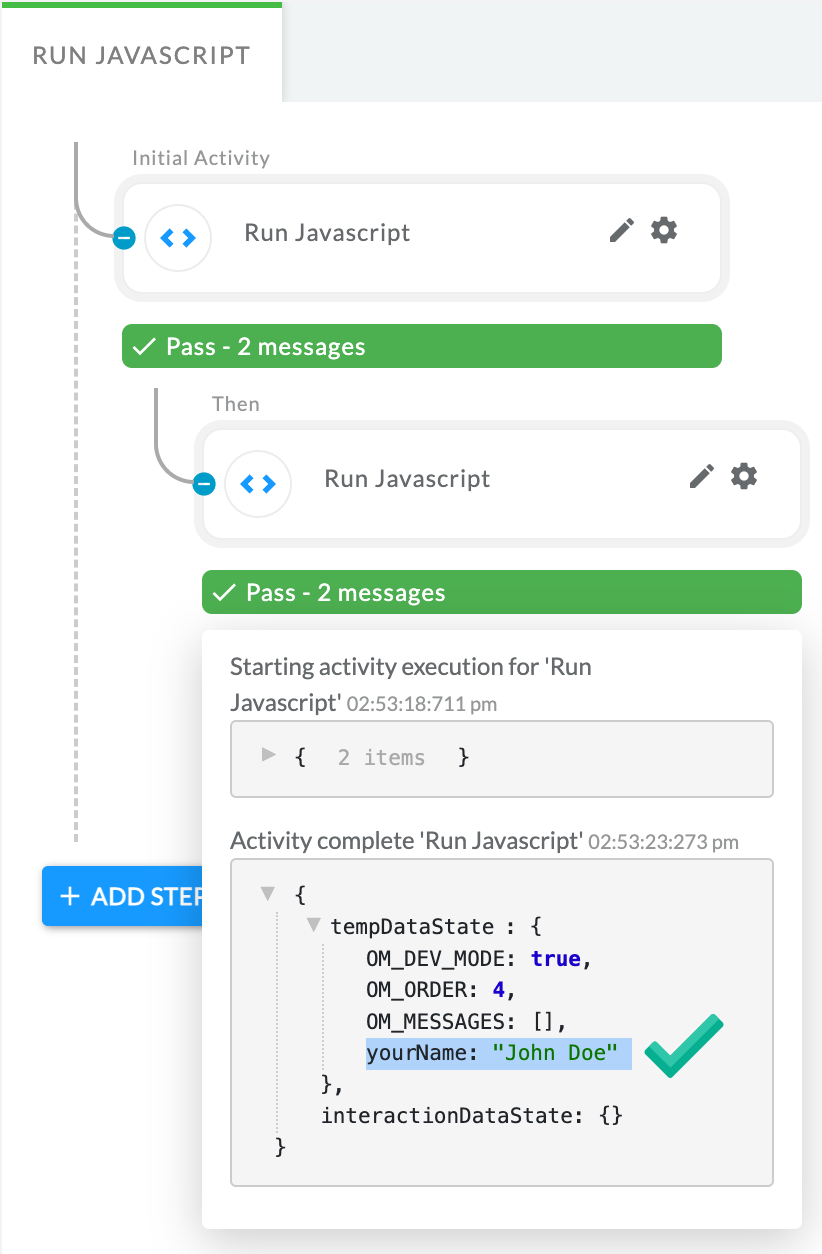
Running the basic test above, you will be prompted with four message alerts:


Dynamic UI Activity with HTML
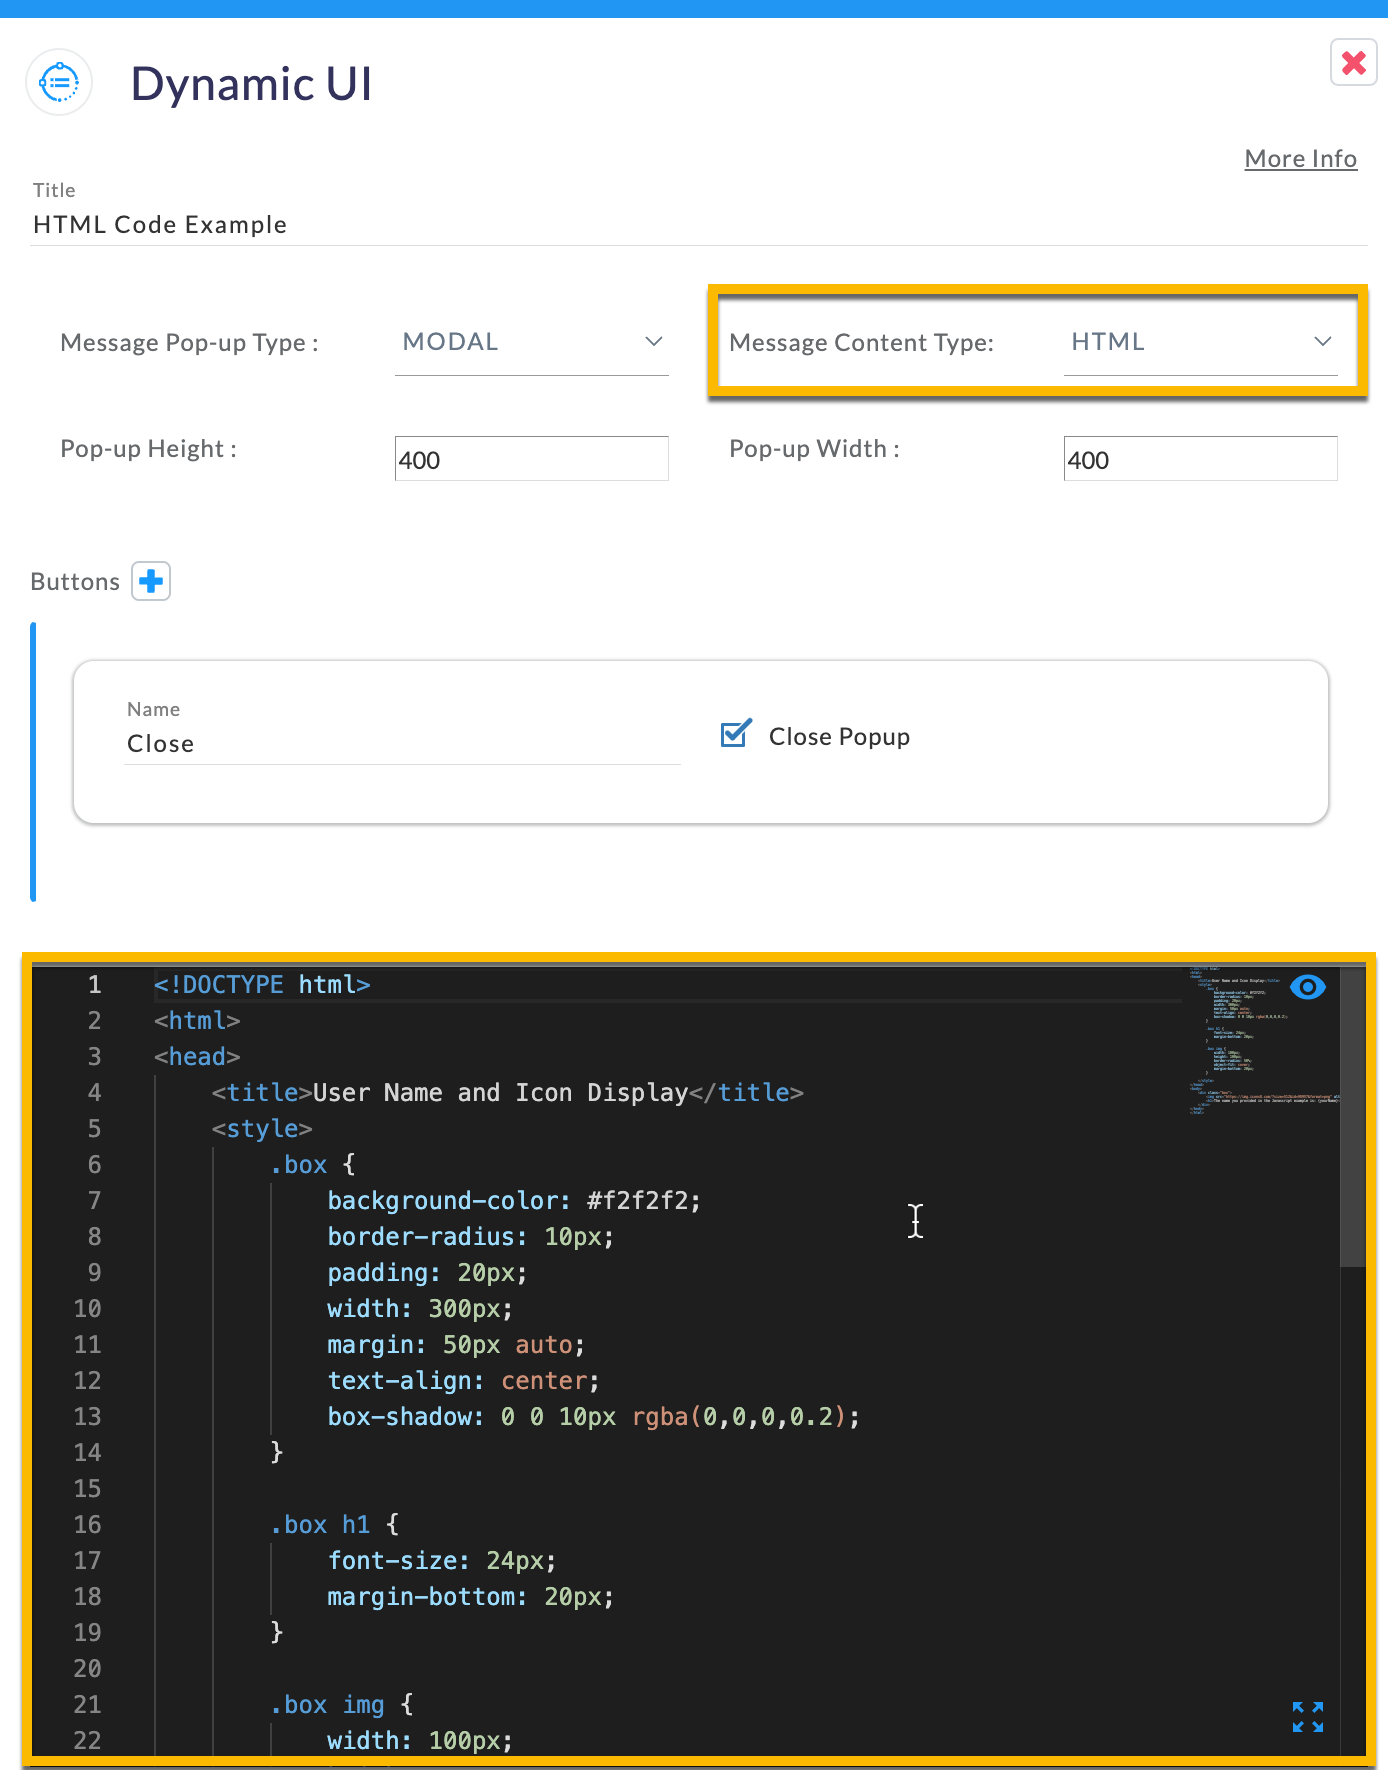
The Dynamic UI is extremely flexible and allows users to write HTML directly into their PopFlow ScreenPops.
HTML can beautify screens, modals, and provide a cleaner experience when interacting with the CRM and User. To further our tests above, we'll implement a ScreenPop that takes the information directly from our Javascript example and displays it into a Modal on the CRM.
Previewing the HTML is easy:
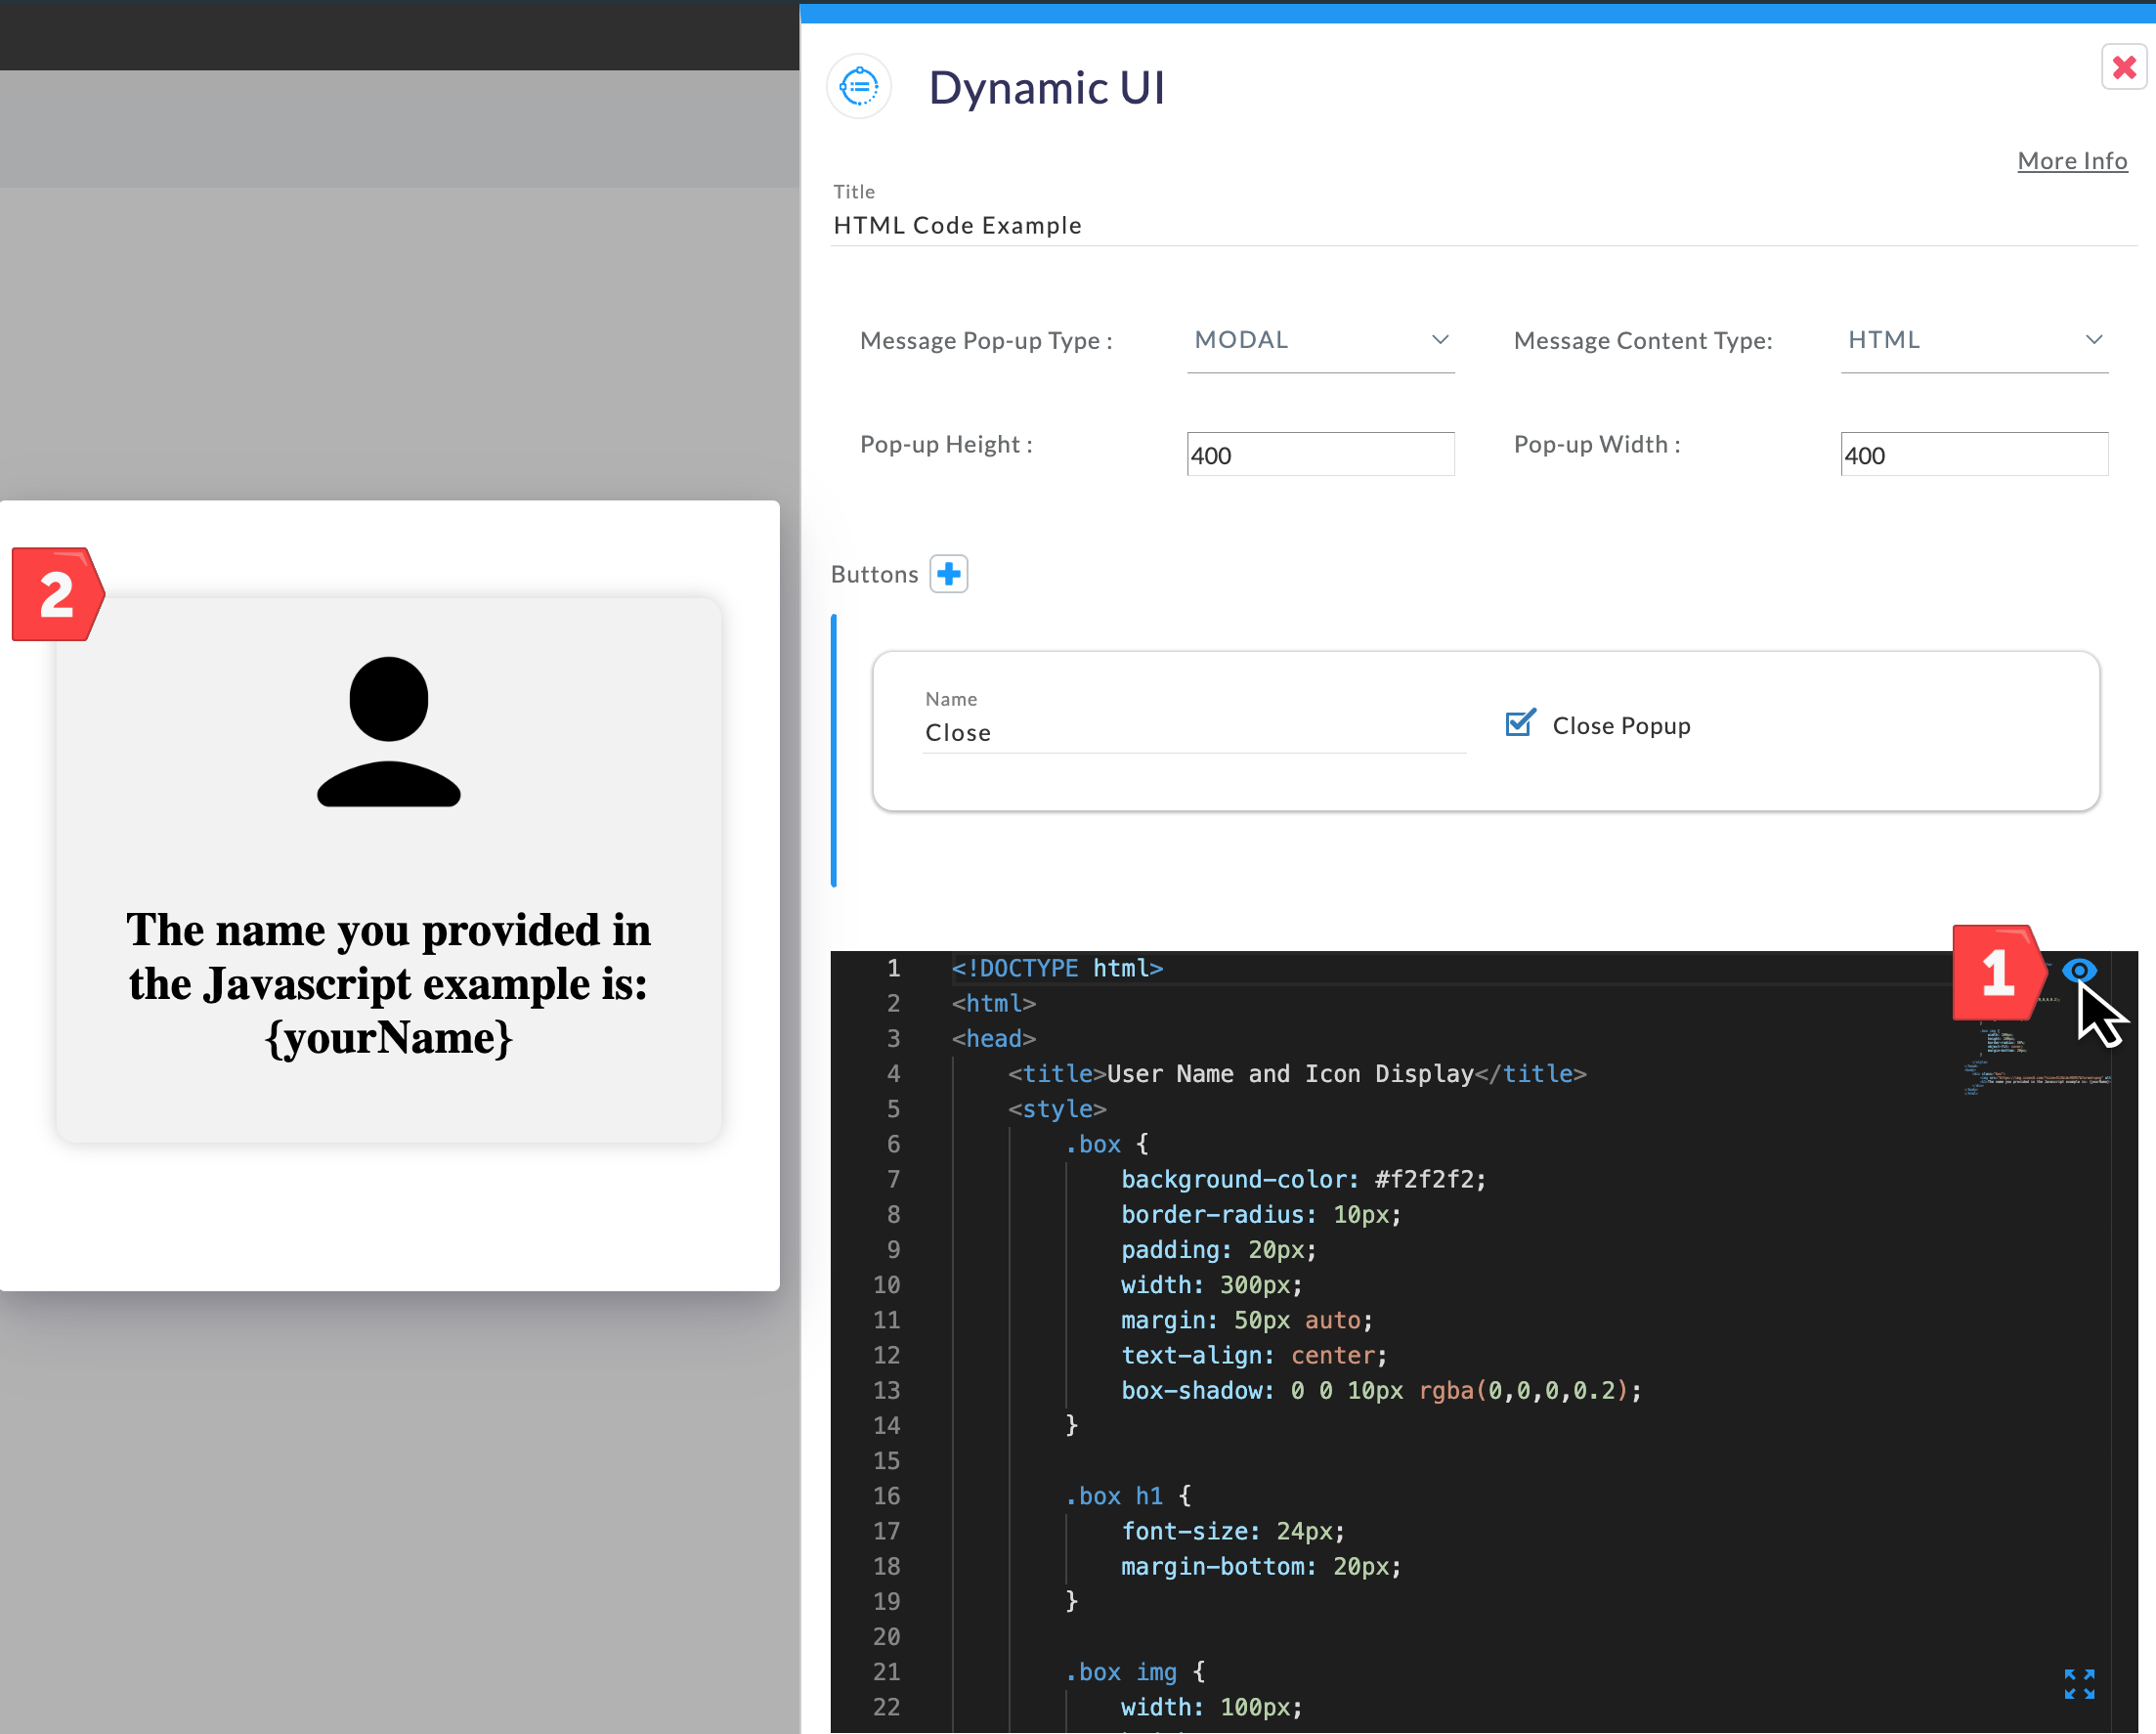
- Click on the “Eye”
- See Modal Preview
The above helps adjust the Modal width, height, and overall previewing information displayed from the HTML code.
💡 TIP: Using HTML Templates
You can always use pre-packaged HTML and uses information from “Set Value” activities to drive its content. This is helpful for those who do not want to edit HTML, understand HTML, and would like to benefit from common use cases using ScreenPop.
Example Code:
Note we've already added yourName into the HTML to show you how you can incorporate the value.
<!DOCTYPE html>
<html>
<head>
	<title>User Name and Icon Display</title>
	<style>
		.box {
			background-color: #f2f2f2;
			border-radius: 10px;
			padding: 20px;
			width: 300px;
			margin: 50px auto;
			text-align: center;
			box-shadow: 0 0 10px rgba(0,0,0,0.2);
		}

		.box h1 {
			font-size: 24px;
			margin-bottom: 20px;
		}

		.box img {
			width: 100px;
			height: 100px;
			border-radius: 50%;
			object-fit: cover;
			margin-bottom: 20px;
		}

	</style>
</head>
<body>
	<div class="box">
		<img src="https://img.icons8.com/?size=512&id=98957&format=png" alt="User Icon">
		<h1>The name you provided in the Javascript example is: {yourName}</h1>
	</div>
</body>
</html>
Having code logic increases the flexibility of what you can accomplish within a workflow! The examples below are helpful codes commonly used within PopFlow.
Saving a variable into tempData
This example is probably one you'll use the most! We covered it above, however, this is the TL;DR version! The information returned into the tempData can be used throughout the interaction and in several workflows.
The “interaction” is the execution of a PopFlow. In short, the data saved in the tempData element is only accessible during the life of the said interaction (PopFlow) and does not live outside of the interaction.
Make sure to see the example “Updating Browsers LocalStorage” to see how you could leverage a bit more information directly into the browser.
//saving a variable into tempData
                                var myVar = "MyVarsResult"
                                state.tempData.myVar = myVar
Integer to String into tempData variable.
state.tempData.textMasterId = state.interactionData.MasterId.toString();JSON object into tempData
Formatting JSON and passing the results into Console as well as tempData:
// JSON object
                                var myJson = {
                                "u_name": "John",
                                "age": 30,
                                "city": "New York"
                                };
                                // Accessing JSON data using JavaScript
                                console.log(myJson.u_name); // Output: John
                                console.log(myJson.age); // Output: 30
                                console.log(myJson.city); // Output: New York

                                //sending JSON data into tempData
                                state.tempData.u_name = myJson.u_name
Updating the browser's LocalStorage
We use the example to update localstorage for later use by other workflows and automation.
Here we are setting the currently active calls (using a callID) into localstorage. While we clear this at the end of the call, it can be used by other PopFlows (e.g. OnTabChange & OnTabSave) to update the attached data for contextual screen pop.
localStorage.setItem('masterId',state.interactionData.MasterId);
                                state.tempData.textMasterId = state.interactionData.MasterId.toString();
                                console.log(localStorage.masterId + ' masterId recieved');
                                console.log(state.tempData.textMasterId + "is the string Value")`
In the next block, you can see that we are reading the stored value for consumption by the OnTabSave workflow to update the screen pop table for transfers in Oracle.
                                  state.tempData.masterId = localStorage.getItem('masterId');`
                                  console.log(localStorage.getItem('masterId'));
Encrypting Comments/Notes Fields
Oracle CRM requires any type of HTTPS Post for the “Comments/Notes” field to be encrypted.
The below is how we used JavaScript to encrypt the comment before posting it to the CRM.
let comments = state.tempData.comments;
                                //alert(comments);
                                // Define the string
                                var decodedStringBtoA = (comments);
                                // Encode the String
                                var encodedStringBtoA = btoa(decodedStringBtoA);
                                console.log(encodedStringBtoA);
                                state.tempData.encodedStringBtoA = encodedStringBtoA;